Intro Link to heading
The Spring Authorization Server is a JVM and Spring based implementation of the OAuth 2.1 and OpenID Connect 1.0 specifications.
Using this framework we will build an OpenID Connect Identity Provider (IdP) and OAuth2 Authorization Server. Starting out with the minimal setup we will extend it with Security Best Current Practice and production ready features.
Parts Link to heading
This is the second of two posts. In the first part we will set up a minimal skeleton of the needed applications. We also made it possible to register as a user. By default, any data stored will only live in memory, and will be lost when the application is stopped. In this post we describe how to extend the Authorization Server with the rest of the features described below, such as persistent storage.
- Extending the Spring Authorization Server - Part 1
- Allow users to register credentials
- Extending the Spring Authorization Server - Part 2 (this post)
- Enabling Proof Key for Code Exchange (PKCE)
- Storing user credentials in a database
- Storing OAuth2 registered clients in a database
- Storing OAuth2 authorizations in a database
- Storing OAuth2 authorization consents in a database
- Using external RSA keys for OAuth2 token signing
Prerequisites Link to heading
- Java Runtime - e.g. Temurin JDK or OpenJDK
- Docker
We will implement the project using the Kotlin programming language, configure the application using the Spring Boot framework, and use the Gradle build and dependency management tool.
Update Authorization Server with improved features Link to heading
Let’s start with implementing the improved security features in the Authorization Server.
Enable PKCE for all OAuth2 clients Link to heading
Enabling PKCE in the Authorization Server is very easy. It is a simple matter of adding the property
require-proof-key: true to the application.yaml file:
### SPRING ###
spring:
  # Security
  security:
    oauth2:
      authorizationserver:
        client:
          spring-oauth2-webapp:
            require-proof-key: true # Enables PKCE
            registration:
              client-id: spring-oauth2-webapp
              client-secret: "{noop}G4nd4lf" # This should be a secure bcrypt cypher
              scopes:
                - openid
                - profile
                - roles
              authorization-grant-types:
                - authorization_code
                - refresh_token
              client-authentication-methods:
                - client_secret_basic
              redirect-uris:
                - http://localhost:8080/login/oauth2/code/spring-oauth2-webapp
Add persistence dependencies Link to heading
Many important values are by default stored in memory. This means that they will disappear each time the Authorization Server is stopped. This doesn’t work well in a production environment, so let’s fix that by adding database persistence.
We need to add necessary dependencies to the Authorization Server build.gradle.kts file. We need Spring Boot
JDBC support, PostgreSQL JDBC driver and Flyway database migration framework.
dependencies {
    implementation("org.jetbrains.kotlin:kotlin-reflect")
    implementation("org.springframework.boot:spring-boot-starter-web")
    implementation("org.springframework.boot:spring-boot-starter-validation")
    implementation("org.springframework.boot:spring-boot-starter-thymeleaf")
    implementation("org.thymeleaf.extras:thymeleaf-extras-springsecurity6")
    implementation("org.springframework.boot:spring-boot-starter-oauth2-authorization-server")
    // Persistence
    implementation("org.springframework.boot:spring-boot-starter-jdbc")
    implementation("org.postgresql:postgresql")
    implementation("org.flywaydb:flyway-database-postgresql")
}
With that in place we are ready to persist data.
Storing user credentials in a database Link to heading
User credentials are by default stored in memory through the use of the InMemoryUserDetailsManager which is used
if no other UserDetailsManager beans are present. We will override this behavior with the use of the
JdbcUserDetailsManager which store user credentials in the database.
We update the WebSecurityConfig configuration bean in the com.onlyteo.sandbox.config package by adding a
factory function for the JdbcUserDetailsManager:
@Bean
fun userDetailsManager(jdbcTemplate: JdbcTemplate): UserDetailsManager {
    return JdbcUserDetailsManager()
        .apply { setJdbcTemplate(jdbcTemplate) }
}
Now we need the database model that will allow us to persist user credentials to the database. Create a
V1__users.sql SQL script file in the Flyway migration folder /src/main/resources/db/migration with the following
contents:
CREATE TABLE users
(
    username VARCHAR(50)  NOT NULL,
    password VARCHAR(500) NOT NULL,
    enabled  BOOLEAN      NOT NULL,
    CONSTRAINT pk_users PRIMARY KEY (username)
);

CREATE TABLE authorities
(
    username  VARCHAR(50) NOT NULL,
    authority VARCHAR(50) NOT NULL,
    CONSTRAINT pk_authorities PRIMARY KEY (username, authority),
    CONSTRAINT fk_authorities_users FOREIGN KEY (username) REFERENCES users (username)
);
The data model is based on the users.ddl file supplied with the spring-security-core module.
Storing OAuth2 registered clients in a database Link to heading
A registered client is a configuration representation of an OAuth2 client in the Authorization Server. In our
example we have one registered client which is the OAuth2 Webapp. Registered clients are by default stored in memory
in an instance of the InMemoryRegisteredClientRepository if no other RegisteredClientRepository beans are
present. We will override this behavior with the use of theJdbcRegisteredClientRepository which store registered
clients in the database.
We update the AuthorizationServerConfig configuration bean in the com.onlyteo.sandbox.config package by adding a
factory function for the JdbcRegisteredClientRepository:
@Bean
fun registeredClientRepository(
    jdbcTemplate: JdbcTemplate,
    properties: OAuth2AuthorizationServerProperties
): RegisteredClientRepository {
    val registeredClients = properties.asRegisteredClients()
    return JdbcRegisteredClientRepository(jdbcTemplate)
        .apply { registeredClients.forEach { save(it) } }
}
In a proper enterprise setup it would make sense to implement an administrative web interface to allow for CRUD
operations on registered clients. However, this is beyond the scope of this post. Instead, we persist registered
client entries that have been specified in the application.yaml file and that is available in the
OAuth2AuthorizationServerProperties properties bean. An extension function has been added to the properties class
that contains mapping logic to instantiate RegisteredClient value objects for each registered client in the
properties. These are then saved to the database by means of the JdbcRegisteredClientRepository.
Now we need the database model that will allow us to persist registered clients to the database. Create a
V2__oauth2_registered_clients.sql SQL script file in the Flyway migration folder
/src/main/resources/db/migration with the following contents:
CREATE TABLE oauth2_registered_client
(
    id                            VARCHAR(100)                            NOT NULL,
    client_id                     VARCHAR(100)                            NOT NULL,
    client_id_issued_at           TIMESTAMP     DEFAULT CURRENT_TIMESTAMP NOT NULL,
    client_secret                 VARCHAR(200)  DEFAULT NULL,
    client_secret_expires_at      TIMESTAMP     DEFAULT NULL,
    client_name                   VARCHAR(200)                            NOT NULL,
    client_authentication_methods VARCHAR(1000)                           NOT NULL,
    authorization_grant_types     VARCHAR(1000)                           NOT NULL,
    redirect_uris                 VARCHAR(1000) DEFAULT NULL,
    post_logout_redirect_uris     VARCHAR(1000) DEFAULT NULL,
    scopes                        VARCHAR(1000)                           NOT NULL,
    client_settings               VARCHAR(2000)                           NOT NULL,
    token_settings                VARCHAR(2000)                           NOT NULL,
    CONSTRAINT pk_oauth2_registered_client PRIMARY KEY (id)
);
The data model is based on the oauth2-registered-client-schema.sql file supplied with the spring-authorization-server module.
Storing OAuth2 authorizations in a database Link to heading
An OAuth2 authorization holds state related to the authorization granted to a client. These are also by default
stored in memory in an instance of the InMemoryOAuth2AuthorizationService if no other OAuth2AuthorizationService
beans are present. We will override this behavior with the use of the JdbcOAuth2AuthorizationService which store
authorizations in the database.
We update the AuthorizationServerConfig configuration bean in the com.onlyteo.sandbox.config package by adding a
factory function for the JdbcOAuth2AuthorizationService:
@Bean
fun oauth2AuthorizationService(
    jdbcTemplate: JdbcTemplate,
    registeredClientRepository: RegisteredClientRepository
): OAuth2AuthorizationService {
    return JdbcOAuth2AuthorizationService(jdbcTemplate, registeredClientRepository)
}
Now we need the database model that will allow us to persist authorizations to the database. Create a
V3__oauth2_authorization.sql SQL script file in the Flyway migration folder
/src/main/resources/db/migration with the following contents:
CREATE TABLE oauth2_authorization
(
    id                            VARCHAR(100) NOT NULL,
    registered_client_id          VARCHAR(100) NOT NULL,
    principal_name                VARCHAR(200) NOT NULL,
    authorization_grant_type      VARCHAR(100) NOT NULL,
    authorized_scopes             VARCHAR(1000) DEFAULT NULL,
    attributes                    TEXT          DEFAULT NULL,
    state                         VARCHAR(500)  DEFAULT NULL,
    authorization_code_value      TEXT          DEFAULT NULL,
    authorization_code_issued_at  TIMESTAMP     DEFAULT NULL,
    authorization_code_expires_at TIMESTAMP     DEFAULT NULL,
    authorization_code_metadata   TEXT          DEFAULT NULL,
    access_token_value            TEXT          DEFAULT NULL,
    access_token_issued_at        TIMESTAMP     DEFAULT NULL,
    access_token_expires_at       TIMESTAMP     DEFAULT NULL,
    access_token_metadata         TEXT          DEFAULT NULL,
    access_token_type             VARCHAR(100)  DEFAULT NULL,
    access_token_scopes           VARCHAR(1000) DEFAULT NULL,
    oidc_id_token_value           TEXT          DEFAULT NULL,
    oidc_id_token_issued_at       TIMESTAMP     DEFAULT NULL,
    oidc_id_token_expires_at      TIMESTAMP     DEFAULT NULL,
    oidc_id_token_metadata        TEXT          DEFAULT NULL,
    refresh_token_value           TEXT          DEFAULT NULL,
    refresh_token_issued_at       TIMESTAMP     DEFAULT NULL,
    refresh_token_expires_at      TIMESTAMP     DEFAULT NULL,
    refresh_token_metadata        TEXT          DEFAULT NULL,
    user_code_value               TEXT          DEFAULT NULL,
    user_code_issued_at           TIMESTAMP     DEFAULT NULL,
    user_code_expires_at          TIMESTAMP     DEFAULT NULL,
    user_code_metadata            TEXT          DEFAULT NULL,
    device_code_value             TEXT          DEFAULT NULL,
    device_code_issued_at         TIMESTAMP     DEFAULT NULL,
    device_code_expires_at        TIMESTAMP     DEFAULT NULL,
    device_code_metadata          TEXT          DEFAULT NULL,
    CONSTRAINT pk_oauth2_authorization PRIMARY KEY (id)
);
The data model is based on the oauth2-authorization-schema.sql file supplied with the spring-authorization-server module.
If we look at the comment in the oauth2-authorization-schema.sql file we see that we needed to modify the SQL syntax,
replacing the use of BLOB with the TEXT datatype since we are using PostgreSQL.
Storing OAuth2 authorization consents in a database Link to heading
An OAuth2 authorization consent holds state related which authorities a resource owner has granted to a client. These
are also by default stored in memory in an instance of the InMemoryOAuth2AuthorizationConsentService if no other
OAuth2AuthorizationConsentService beans are present. We will override this behavior with the use of the
JdbcOAuth2AuthorizationConsentService which store authorization consent in the database.
We update the AuthorizationServerConfig configuration bean in the com.onlyteo.sandbox.config package by adding a
factory function for the JdbcOAuth2AuthorizationConsentService:
@Bean
fun oauth2AuthorizationConsentService(
    jdbcTemplate: JdbcTemplate,
    registeredClientRepository: RegisteredClientRepository
): OAuth2AuthorizationConsentService {
    return JdbcOAuth2AuthorizationConsentService(jdbcTemplate, registeredClientRepository)
}
Now we need the database model that will allow us to persist authorization consent to the database. Create a
V4__oauth2_authorization_consent.sql SQL script file in the Flyway migration folder
/src/main/resources/db/migration with the following contents:
CREATE TABLE oauth2_authorization_consent
(
    registered_client_id VARCHAR(100)  NOT NULL,
    principal_name       VARCHAR(200)  NOT NULL,
    authorities          VARCHAR(1000) NOT NULL,
    CONSTRAINT pk_oauth2_authorization_consent PRIMARY KEY (registered_client_id, principal_name)
);
The data model is based on the oauth2-authorization-consent-schema.sql file supplied with the spring-authorization-server module.
Using external RSA keys for OAuth2 token signing Link to heading
The default behaviour of Spring Security is to use an in-memory [JWKSource] that generates new JSON Web Keys each time the application starts. The JSON Web Keys are used for both signing and verifying JSON Web Tokens, but also for exposing the Open ID Connect JWK endpoint. When the keys are recreated any active JWTs will in effect be invalid. We remedy this by using pre-generated keys that are loaded from the file system on startup.
Let’s generate an RSA key pair using the command line and place them in the /src/main/resources/keys folder:
openssl genrsa -out private.pem 2048
openssl rsa -in private.pem -pubout -out public.pem
We update the server properties file application.yaml with a new section containing properties for the keys:
### APP ###
app:
  keys:
    - id: dcf4670f-b5d4-414a-8a9c-a102b6871099 # Randomly generated key ID
      public-key: classpath:keys/public.pem
      private-key: classpath:keys/private.pem
The keys are packaged with the Authorization Server code so they can be retrieved from the classpath using the
classpath: file prefix. By using the file: prefix the keys could be retrieved from a static folder.
Then we create a configuration properties bean AppProperties to hold the new properties in the
/src/main/kotlin/ path under com.onlyteo.sandbox.proerties package:
package com.onlyteo.sandbox.properties

import jakarta.validation.Valid
import jakarta.validation.constraints.NotBlank
import jakarta.validation.constraints.NotNull
import org.springframework.boot.context.properties.ConfigurationProperties
import org.springframework.boot.context.properties.bind.ConstructorBinding

@ConfigurationProperties("app")
data class AppProperties @ConstructorBinding constructor(
    @field:Valid
    @field:NotNull
    val keys: List<KeyProperties>
)

data class KeyProperties @ConstructorBinding constructor(
    @field:NotBlank
    val id: String,
    @field:NotBlank
    val publicKey: String,
    @field:NotBlank
    val privateKey: String
)
We enable the configuration properties bean by adding a class level annotation to the top of the
AuthorizationServerConfig configuration bean:
@EnableConfigurationProperties(AppProperties::class)
@Configuration(proxyBeanMethods = false)
class AuthorizationServerConfig {
    ...
}
Now we create a KeyHandler tool in the /src/main/kotlin/ path under com.onlyteo.sandbox.handler package:
package com.onlyteo.sandbox.handler

import com.nimbusds.jose.JWSAlgorithm
import com.nimbusds.jose.jwk.KeyUse
import com.nimbusds.jose.jwk.RSAKey
import org.springframework.util.FileCopyUtils
import java.io.File
import java.io.FileInputStream
import java.io.InputStreamReader
import java.security.KeyFactory
import java.security.interfaces.RSAPrivateKey
import java.security.interfaces.RSAPublicKey
import java.security.spec.PKCS8EncodedKeySpec
import java.security.spec.X509EncodedKeySpec
import java.util.*

object KeyHandler {

    fun readRsaKey(
        keyId: String,
        publicKeyFile: File,
        privateKeyFile: File
    ): RSAKey {
        val keyFactory = KeyFactory.getInstance("RSA")
        val publicKey = keyFactory.readPublicKey(publicKeyFile)
        val privateKey = keyFactory.readPrivateKey(privateKeyFile)
        return RSAKey.Builder(publicKey)
            .privateKey(privateKey)
            .keyID(keyId)
            .keyUse(KeyUse.SIGNATURE)
            .algorithm(JWSAlgorithm.RS256)
            .build()
    }

    private fun KeyFactory.readPublicKey(publicKeyFile: File): RSAPublicKey {
        return FileInputStream(publicKeyFile).use {
            val pem = FileCopyUtils.copyToString(InputStreamReader(it))
            val pemBase64 = pem
                .replace("-----BEGIN PUBLIC KEY-----", "")
                .replace("-----END PUBLIC KEY-----", "")
            val pemBytes = Base64.getMimeDecoder().decode(pemBase64)
            (generatePublic(X509EncodedKeySpec(pemBytes)) as RSAPublicKey)
        }
    }

    private fun KeyFactory.readPrivateKey(privateKeyFile: File): RSAPrivateKey {
        return FileInputStream(privateKeyFile).use {
            val pem = FileCopyUtils.copyToString(InputStreamReader(it))
            val pemBase64 = pem
                .replace("-----BEGIN PRIVATE KEY-----", "")
                .replace("-----END PRIVATE KEY-----", "")
            val pemBytes = Base64.getMimeDecoder().decode(pemBase64)
            (generatePrivate(PKCS8EncodedKeySpec(pemBytes)) as RSAPrivateKey)
        }
    }
}
This tool reads the keys from the file system and instantiates an RSAKey object.
With all this in place we can now override the JWK behaviour by adding factory functions for JwtDecoder and
JWKSource beans to the AuthorizationServerConfig configuration bean:
@Bean
fun jwtDecoder(jwkSource: JWKSource<SecurityContext>): JwtDecoder {
    return OAuth2AuthorizationServerConfiguration.jwtDecoder(jwkSource)
}

@Bean
fun jwkSource(
    resourceLoader: ResourceLoader,
    appProperties: AppProperties
): JWKSource<SecurityContext> {
    val rsaKeys = appProperties.keys.map { key ->
        val publicKeyFile = resourceLoader.getResource(key.publicKey).file
        val privateKeyFile = resourceLoader.getResource(key.privateKey).file
        KeyHandler.readRsaKey(key.id, publicKeyFile, privateKeyFile)
    }
    return ImmutableJWKSet(JWKSet(rsaKeys))
}
And that’s it! We have implemented all the features that we listed. The Authorization Server can of course be further customized, but this is a good baseline in order to run this in production.
Now let’s update the Webapp accordingly.
Update Webapp with improved features Link to heading
In order for the Webapp to support the improvements to security features that we have implemented in the Authorization Server it must also be updated with a few features. Currently pure property driven configuration is not sufficient to enable these features. We must update the default Spring configuration by overriding a few Spring beans and configuration classes.
Enable PKCE and OIDC logout support Link to heading
The Authorization Server was updated so that all OAuth2 clients are required to use PKCE together with the Authorization Code flow. Therefor PKCE must also be enabled in the Webapp. We must also enable a complete OIDC logout flow. This will ensure that logout will clear the session both in the Webapp and in the Authorization Server.
We add a WebSecurityConfig bean into the /src/main/kotlin/ path under com.onlyteo.sandbox.config package:
@Configuration(proxyBeanMethods = false)
class WebSecurityConfig {
}
To enable the OIDC logout feature we add a bean factory function the creates a specialized LogoutSuccessHandler
bean to the WebSecurityConfig class:
@Bean
fun logoutSuccessHandler(
    clientRegistrationRepository: ClientRegistrationRepository
): LogoutSuccessHandler {
    return OidcClientInitiatedLogoutSuccessHandler(clientRegistrationRepository)
}
To enable the PKCE feature we add the following bean factory function to the WebSecurityConfig class:
@Bean
fun oAuth2AuthorizationRequestResolver(
    clientRegistrationRepository: ClientRegistrationRepository
): OAuth2AuthorizationRequestResolver {
    return DefaultOAuth2AuthorizationRequestResolver(
        clientRegistrationRepository,
        DEFAULT_AUTHORIZATION_REQUEST_BASE_URI
    ).apply {
        setAuthorizationRequestCustomizer(OAuth2AuthorizationRequestCustomizers.withPkce()) // Enables PKCE
    }
}
This all comes together in a webSecurityFilterChain factory function like this:
@Bean
@Throws(Exception::class)
fun webSecurityFilterChain(
    http: HttpSecurity,
    oAuth2AuthorizationRequestResolver: OAuth2AuthorizationRequestResolver,
    logoutSuccessHandler: LogoutSuccessHandler
): SecurityFilterChain {
    return http
        .authorizeHttpRequests {
            it.requestMatchers("/assets/**", "/error").permitAll()
                .anyRequest().authenticated()
        }
        .oauth2Login {
            it.authorizationEndpoint { auth ->
                auth.authorizationRequestResolver(oAuth2AuthorizationRequestResolver)
            }
        }
        .logout {
            it.logoutSuccessHandler(logoutSuccessHandler)
        }
        .build()
}
With this in place the project will now look like this:
▼ spring-oauth2-webapp
   ⯈ gradle
   ▼ src
      ▼ main
         ▼ kotlin
            ▼ com
               ▼ onlyteo
                  ▼ sandbox
                     ▼ config
                        WebSecurityConfig.kt
                     ▼ controller
                        ViewController.kt
                     SpringOauth2WebappApplication.kt
         ⯈ resources
   .gitignore
   build.gradle.kts
   gradlew
   gradlew.bat
   settings.gradle.kts
This concludes the necessary changes for the Webapp. Now we can test the whole setup.
Testing the OAuth2/OIDC Authorization Code login flow Link to heading
Let’s test that everything works as expected.
Set up a PostgreSQL database with Docker Link to heading
We need a persistent storage for many of the features. For that we will use a Docker powered PostgreSQL database.
In the root of the Authorization Server project create a docker-compose.yaml file with the contents:
### SERVICES ###
services:
  postgres:
    image: postgres
    container_name: postgres
    environment:
      POSTGRES_USER: root
      POSTGRES_PASSWORD: G4nd4lf
    ports:
      - "5432:5432"
    volumes:
      - ./src/main/resources/db/init:/docker-entrypoint-initdb.d
      - postgres.data:/var/lib/postgresql/data
    networks:
      - postgres

### VOLUMES ###
volumes:
  postgres.data:
    name: postgres.data

### NETWORKS ###
networks:
  postgres:
    name: postgres
Add a database initialization script authorization_server.sql to the /src/main/resources/db/init path with the
contents:
CREATE USER authorization_server WITH PASSWORD 'G4nd4lf';
CREATE DATABASE authorization_server WITH OWNER authorization_server;
Start the PostgreSQL Docker container by running the following command from the Authorization Server project root:
docker compose up -d
Run the Authorization Server Link to heading
In a terminal go into the project folder of the Authorization Server ./extended-spring-authorization-server and
start the Spring Boot application using Gradle:
./gradlew bootRun
The application is running when you see it logging the following message in the terminal:
Started ExtendedSpringAuthorizationServerApplicationKt in X seconds
If we open a SQL client and check the registered clients table oauth2_registered_client we should see one entry:
select * from oauth2_registered_client;
You should see a single row with content similar to:
| id | client_id | … |
|---|---|---|
| spring-oauth2-webapp | spring-oauth2-webapp | … |
Run the Webapp Link to heading
In a terminal go into the project folder of the Webapp ./spring-oauth2-webapp and start the Spring Boot
application using Gradle:
./gradlew bootRun
The application is running when you see it logging the following message in the terminal:
Started SpringOauth2WebappApplicationKt in X seconds
Register and log in Link to heading
Let’s open the home page of the Webapp in a browser http://localhost:8080.
We see that we are quickly redirected to the Authorization Server address for login http://127.0.0.1:8888/login.
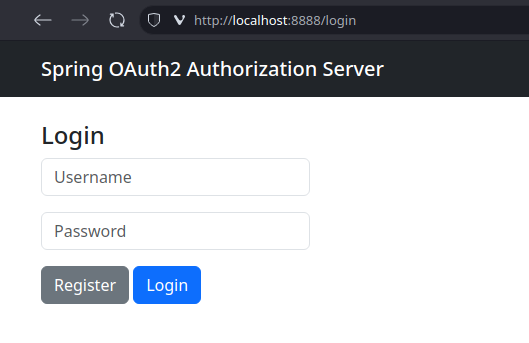
We don’t have any user credentials yet that we can use to log in, so we need to first register a new user. We click
the [Register] button to navigate to the registration page.
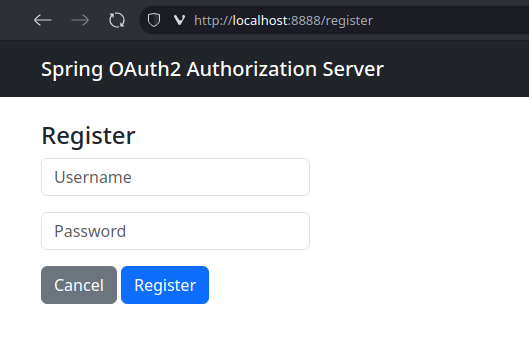
We supply the username and password combination we want and click the [Register] to complete the registration of
our new user.
If we now look what is in the users table:
select * from users;
We should see the user we just registered:
| username | password | enabled |
|---|---|---|
| bilbo | … | true |
After the registration completes we are redirected back to the login page. Here we supply the same credentials we
used when we registered, and then we click [Login].
Upon successful login we will be redirected back to the Webapp home page.
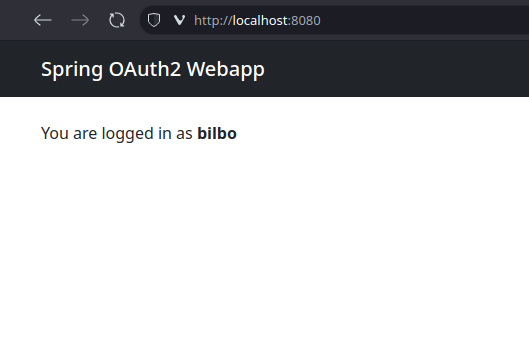
We see that the home page displays the username of the logged-in user.
Now we can look into the oauth2_authorization table:
select * from oauth2_authorization;
We should see one row:
| id | registered_client_id | principal_name | … |
|---|---|---|---|
| … | spring-oauth2-webapp | bilbo | … |
And that is it! All the extended features works like a charm. Happy coding!