Intro Link to heading
The Spring Authorization Server is an implementation of the OAuth 2.1 and OpenID Connect 1.0 specifications based on the JVM and the Spring Framework based.
Using this framework we will build an OAuth2 Authorization Server and OpenID Connect Identity Provider (IdP). Starting out with the minimal setup we will extend it with Security Best Current Practice and production ready features.
Parts Link to heading
This is the first of two posts. In this post we will set up a minimal skeleton of the needed applications. We will also make it possible to register as a user. By default, any data stored will only live in memory, and will be lost when the application is stopped. In the second part we describe how to extend the Authorization Server with the rest of the features described below, such as persistent storage.
- Extending the Spring Authorization Server - Part 1 (this post)
- Allow users to register credentials
- Extending the Spring Authorization Server - Part 2
- Enabling Proof Key for Code Exchange (PKCE)
- Storing user credentials in a database
- Storing OAuth2 registered clients in a database
- Storing OAuth2 authorizations in a database
- Storing OAuth2 authorization consents in a database
- Using external RSA keys for OAuth2 token signing
Prerequisites Link to heading
- Java Runtime - e.g. Temurin JDK or OpenJDK
- Docker
We will implement the project using the Kotlin programming language, configure the application using the Spring Boot framework, and use the Gradle build and dependency management tool.
Create an Authorization Server Link to heading
Our first task is to set up a minimal Authorization Server. It will use default configuration where values are stored in memory. The only upgrade from a pure vanilla setup is that we will use the Thymeleaf templating engine to render webpages. And we will make it possible to register new users that can be used to log in and access the secured Webapp.
Using the Spring Initializr website Link to heading
The easies way to bootstrap a new Spring project is by using Spring’s own Initializr tool. Spring offers several different ways to use the Initializr tool. They have a dedicated CLI, as well as plugins for popular IDEs like IntelliJ and Eclipse. But we will use the Spring Initializr website start.spring.io.
Go to the Spring Initializr website and select the needed options.
Important selections include:
- Project type: Gradle - Kotlin
- Language: Kotlin
- Spring Boot version: latest stable (currently 3.4.2)
- Packaging: Jar
- Java version: 21
- Dependencies:
- Spring Web
- Thymeleaf
- OAuth2 Authorization Server
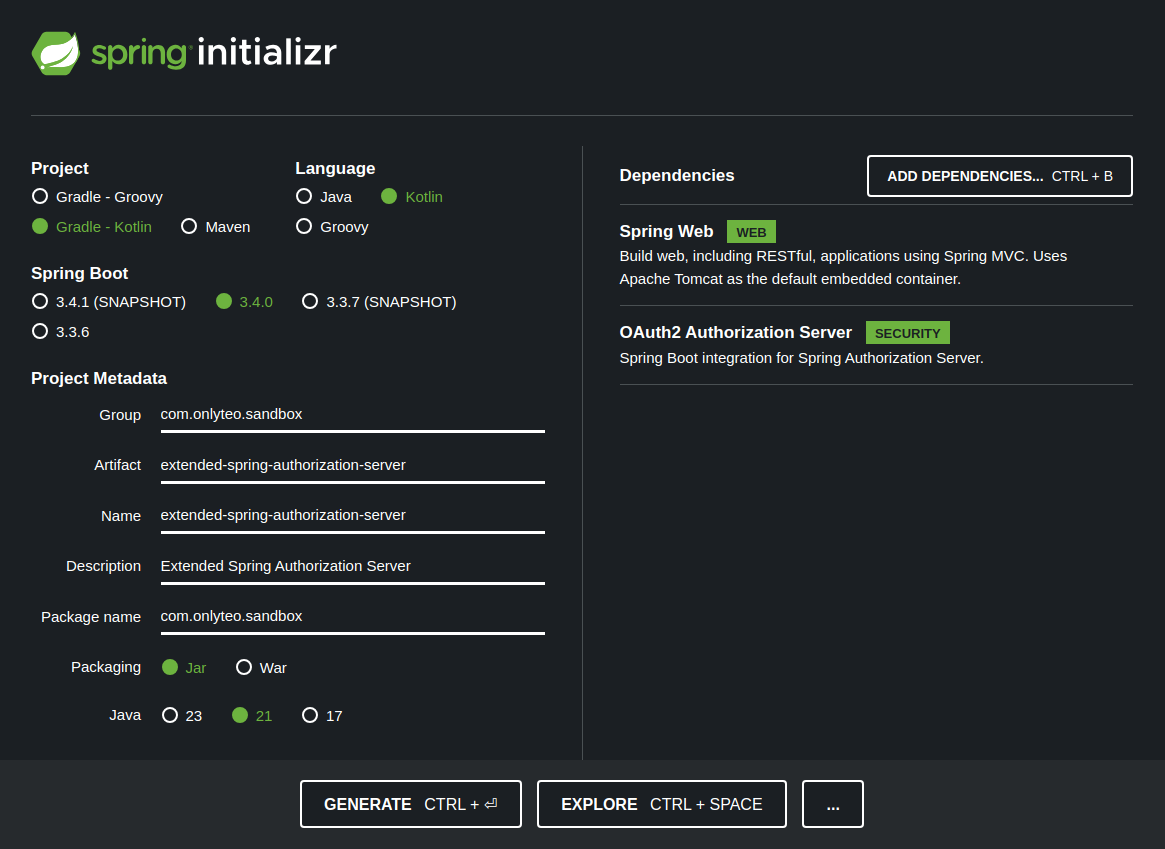
Click the [GENERATE] button to generate and download the project.
Extract and clean up the project Link to heading
Once downloaded we have a .zip file containing a template project. Unzip the archive into a suitable location and
open it in your favorite editor or IDE.
Delete unnecessary files until your project look something like this:
▼ extended-spring-authorization-server
   ⯈ gradle
   ▼ src
      ▼ main
         ▼ kotlin
            ▼ com
               ▼ onlyteo
                  ▼ sandbox
                     ExtendedSpringAuthorizationServerApplication.kt
         ▼ resources
            application.properties
   .gitignore
   build.gradle.kts
   gradlew
   gradlew.bat
   settings.gradle.kts
We will swap the configuration file application.properties from a properties file to a yaml file
application.yaml. The contents should be modified into YAML format:
spring:
  application:
    name: extended-spring-authorization-server
  security:
    oauth2:
      authorizationserver:
        client:
          spring-oauth2-webapp:
            registration:
              client-id: spring-oauth2-webapp
              client-secret: "{noop}G4nd4lf" # This should be a secure bcrypt cypher
              scopes:
                - openid
                - profile
                - roles
              authorization-grant-types:
                - authorization_code
                - refresh_token
              client-authentication-methods:
                - client_secret_basic
              redirect-uris:
                - http://localhost:8080/login/oauth2/code/spring-oauth2-webapp

logging:
  level:
    root: INFO
    com.onlyteo: DEBUG

server:
  port: 8888
The most important properties are under the spring.security.oauth2.authorizationserver prefix. There is an entry for
a single OAuth2 Client named spring-oauth2-webapp. This is known in Spring Security terms as a Registered Client.
The server port has been changed from the default in order to avoid port collision with the Webapp during local development.
Add necessary configuration Link to heading
To be able to use a custom login page we must override the default Spring Boot configuration. We add a
WebSecurityConfig bean into the /src/main/kotlin/ path under com.onlyteo.sandbox.config package with the
following contents:
package com.onlyteo.sandbox.config

import org.springframework.context.annotation.Bean
import org.springframework.context.annotation.Configuration
import org.springframework.security.config.annotation.web.builders.HttpSecurity
import org.springframework.security.crypto.factory.PasswordEncoderFactories
import org.springframework.security.crypto.password.PasswordEncoder
import org.springframework.security.web.SecurityFilterChain

@Configuration(proxyBeanMethods = false)
class WebSecurityConfig {

    @Order(2) // Must be before authorizationServerSecurityFilterChain
    @Bean
    fun webSecurityFilterChain(http: HttpSecurity): SecurityFilterChain {
        return http
            .authorizeHttpRequests {
                it.requestMatchers("/register", "/error").permitAll()
                    .anyRequest().authenticated()
            }
            .formLogin {
                it.loginPage("/login").permitAll()
            }
            .build()
    }

    @Bean
    fun passwordEncoder(): PasswordEncoder {
        return PasswordEncoderFactories.createDelegatingPasswordEncoder()
    }
}
The configuration bean has a factory function for a SecurityFilterChain bean. Using the supplied builder we
specify that the /register and /error paths should not be secured. We also instructs Spring Security to protect
the rest of the application with a form login, whose login page will be located at the /login path.
There is also a factory function for a PasswordEncoder bean. It will be used to encode passwords that the
users inputs during the registration process.
Since we are overriding the security filter chain for the authentication flow it fully disables the
Spring Boot autoconfiguration for the authorization server. We must therefor also add a security filter chain
for the authorization server OAuth2/OIDC protocol endpoints. We add a AuthorizationServerConfig bean into the
/src/main/kotlin/ path under com.onlyteo.sandbox.config package with the following contents:
package com.onlyteo.sandbox.config

import org.springframework.context.annotation.Bean
import org.springframework.context.annotation.Configuration
import org.springframework.core.annotation.Order
import org.springframework.http.MediaType
import org.springframework.security.config.Customizer
import org.springframework.security.config.annotation.web.builders.HttpSecurity
import org.springframework.security.oauth2.server.authorization.config.annotation.web.configurers.OAuth2AuthorizationServerConfigurer
import org.springframework.security.web.SecurityFilterChain
import org.springframework.security.web.authentication.LoginUrlAuthenticationEntryPoint
import org.springframework.security.web.util.matcher.MediaTypeRequestMatcher

@Configuration(proxyBeanMethods = false)
class AuthorizationServerConfig {

    @Order(1) // Must be after webSecurityFilterChain
    @Bean
    fun authorizationServerSecurityFilterChain(http: HttpSecurity): SecurityFilterChain {
        val configurer = OAuth2AuthorizationServerConfigurer
            .authorizationServer()
            .oidc(Customizer.withDefaults()) // Enable OpenID Connect 1.0
        return http
            .securityMatcher(configurer.endpointsMatcher)
            .with(configurer, Customizer.withDefaults())
            .authorizeHttpRequests { it.anyRequest().authenticated() }
            .exceptionHandling {
                it.defaultAuthenticationEntryPointFor(
                    LoginUrlAuthenticationEntryPoint("/login"),
                    MediaTypeRequestMatcher(MediaType.TEXT_HTML)
                )
            }
            .build()
    }
}
For the user registration page we need a value object to hold the user supplied credentials. We add a
RegisterFormData data class into the /src/main/kotlin/ path under com.onlyteo.sandbox.model package with the
following contents:
package com.onlyteo.sandbox.model

import jakarta.validation.constraints.Size

data class RegisterFormData(
    @field:Size(min = 3) val username: String? = null,
    @field:Size(min = 6) val password: String? = null
)
However, Spring holds user credentials in UserDetails objects, which are stored in a UserDetailsManager bean. To
convert from a RegisterFormData object to a UserDetails object we create a Converter bean and place it into the
/src/main/kotlin/ path under the com.onlyteo.sandbox.converter package with the following contents:
package com.onlyteo.sandbox.converter

import com.onlyteo.sandbox.model.RegisterFormData
import org.springframework.core.convert.converter.Converter
import org.springframework.lang.NonNull
import org.springframework.security.core.userdetails.User
import org.springframework.security.core.userdetails.UserDetails
import org.springframework.security.crypto.password.PasswordEncoder
import org.springframework.stereotype.Component

@Component
class RegisterFormDataToUserDetailsConverter(
    private val passwordEncoder: PasswordEncoder
) : Converter<RegisterFormData, UserDetails> {

    override fun convert(@NonNull source: RegisterFormData): UserDetails {
        return User.builder()
            .passwordEncoder(passwordEncoder::encode)
            .username(source.username)
            .password(source.password)
            .roles("USER")
            .disabled(false)
            .accountExpired(false)
            .accountLocked(false)
            .credentialsExpired(false)
            .build()
    }
}
Add Thymeleaf login page and registration page Link to heading
Now we are ready to add an MVC Controller bean ViewController into the /src/main/kotlin/ path under the
com.onlyteo.sandbox.controller package with the following contents:
package com.onlyteo.sandbox.controller

import com.onlyteo.sandbox.model.RegisterFormData
import jakarta.validation.Valid
import jakarta.validation.constraints.NotNull
import org.springframework.core.convert.ConversionService
import org.springframework.security.core.userdetails.UserDetails
import org.springframework.security.provisioning.UserDetailsManager
import org.springframework.stereotype.Controller
import org.springframework.ui.Model
import org.springframework.validation.BindingResult
import org.springframework.web.bind.annotation.GetMapping
import org.springframework.web.bind.annotation.ModelAttribute
import org.springframework.web.bind.annotation.PostMapping

@Controller
class ViewController(
    private val conversionService: ConversionService,
    private val userDetailsManager: UserDetailsManager
) {

    @GetMapping(path = ["/login"])
    fun getLoginPage(): String {
        return "login"
    }

    @GetMapping(path = ["/register"])
    fun getRegisterPage(model: Model): String {
        model.addAttribute("registerFormData", RegisterFormData())
        return "register"
    }

    @PostMapping(path = ["/register"])
    fun postRegisterPage(
        model: Model,
        @ModelAttribute @Valid @NotNull registerFormData: RegisterFormData?,
        bindingResult: BindingResult
    ): String {
        if (bindingResult.hasErrors()) {
            model.addAttribute("registerFormData", registerFormData)
            return "register"
        }
        val userDetails = conversionService.convert(registerFormData, UserDetails::class.java)
        userDetailsManager.createUser(userDetails)
        return "redirect:/login"
    }
}
Then we add a Thymeleaf enabled login page login.html to the /src/main/resources/templates/ path with the
contents:
<!DOCTYPE HTML>
<html lang="en" xmlns:th="http://www.thymeleaf.org">
<head>
    <title>Spring OAuth2 Authorization Server</title>
    <meta http-equiv="Content-Type" content="text/html; charset=UTF-8"/>
    <link rel="stylesheet"
          href="https://cdn.jsdelivr.net/npm/bootstrap@5.3.3/dist/css/bootstrap.min.css"
          integrity="sha384-QWTKZyjpPEjISv5WaRU9OFeRpok6YctnYmDr5pNlyT2bRjXh0JMhjY6hW+ALEwIH"
          crossorigin="anonymous">
</head>
<body>
<main>
    <header class="text-bg-dark px-5 py-3">
        <h5 class="m-0">Spring OAuth2 Authorization Server</h5>
    </header>
    <section class="px-5 py-4">
        <h4>Login</h4>
        <form th:action="@{/login}" method="post">
            <div class="form-group mb-3">
                <input type="text" name="username" placeholder="Username" class="form-control w-25"/>
            </div>
            <div class="form-group mb-3">
                <input type="password" name="password" placeholder="Password" class="form-control w-25"/>
            </div>
            <div class="form-group">
                <a class="btn btn-secondary" th:href="@{/register}">Register</a>
                <button type="submit" class="btn btn-primary">Login</button>
            </div>
            <input type="hidden" name="${_csrf.parameterName}" value="${_csrf.token}"/>
        </form>
    </section>
</main>
</body>
</html>
Lastly we add a Thymeleaf enabled registration page registration.html to the /src/main/resources/templates/ path
with the contents:
<!DOCTYPE HTML>
<html lang="en" xmlns:th="http://www.thymeleaf.org">
<head>
    <title>Spring OAuth2 Authorization Server</title>
    <meta http-equiv="Content-Type" content="text/html; charset=UTF-8"/>
    <link rel="icon" type="image/png" href="/favicon.png">
    <link rel="icon" type="image/svg+xml" href="/favicon.svg">
    <link rel="stylesheet"
          href="https://cdn.jsdelivr.net/npm/bootstrap@5.3.3/dist/css/bootstrap.min.css"
          integrity="sha384-QWTKZyjpPEjISv5WaRU9OFeRpok6YctnYmDr5pNlyT2bRjXh0JMhjY6hW+ALEwIH"
          crossorigin="anonymous">
</head>
<body>
<main>
    <header class="text-bg-dark px-5 py-3">
        <h5 class="m-0">Spring OAuth2 Authorization Server</h5>
    </header>
    <section class="px-5 py-4">
        <h4>Register</h4>
        <form th:action="@{/register}" th:object="${registerFormData}" method="post">
            <div class="form-group mb-3">
                <input type="text" placeholder="Username" th:field="*{username}" class="form-control w-25">
            </div>
            <div class="form-group mb-3">
                <input type="password" placeholder="Password" th:field="*{password}" class="form-control w-25">
            </div>
            <div class="form-group">
                <a class="btn btn-secondary" th:href="@{/login}">Cancel</a>
                <button type="submit" class="btn btn-primary">Register</button>
            </div>
            <input type="hidden" name="${_csrf.parameterName}" value="${_csrf.token}"/>
        </form>
    </section>
</main>
</body>
</html>
With all this in place the project should look like this:
▼ extended-spring-authorization-server
   ⯈ gradle
   ▼ src
      ▼ main
         ▼ kotlin
            ▼ com
               ▼ onlyteo
                  ▼ sandbox
                     ▼ config
                        AuthorizationServerConfig
                        WebSecurityConfig.kt
                     ▼ controller
                        ViewController.kt
                     ▼ converter
                        RegisterFormDataToUserDetailsConverter.kt
                     ▼ model
                        RegisterFormData.kt
                     ExtendedSpringAuthorizationServerApplication.kt
         ▼ resources
            ▼ templates
               login.html
               register.html
            application.yaml
   .gitignore
   build.gradle.kts
   gradlew
   gradlew.bat
   settings.gradle.kts
And that’s it for the Authorization Server!
Create a Webapp to secure with OAuth2 Link to heading
Next we create a simple Spring MVC Webapp which we will secure using the Spring Authorization Server. The Webapp will also use the Thymeleaf templating engine to render webpages.
Using the Spring Initializr website Link to heading
We will use the same method for creating the Webapp project as we did for the Authorization Server.
Go to the Spring Initializr website and select the needed options.
Important selections include:
- Project type: Gradle - Kotlin
- Language: Kotlin
- Spring Boot version: latest stable (currently 3.4.2)
- Packaging: Jar
- Java version: 21
- Dependencies:
- Spring Web
- Thymeleaf
- OAuth2 Client
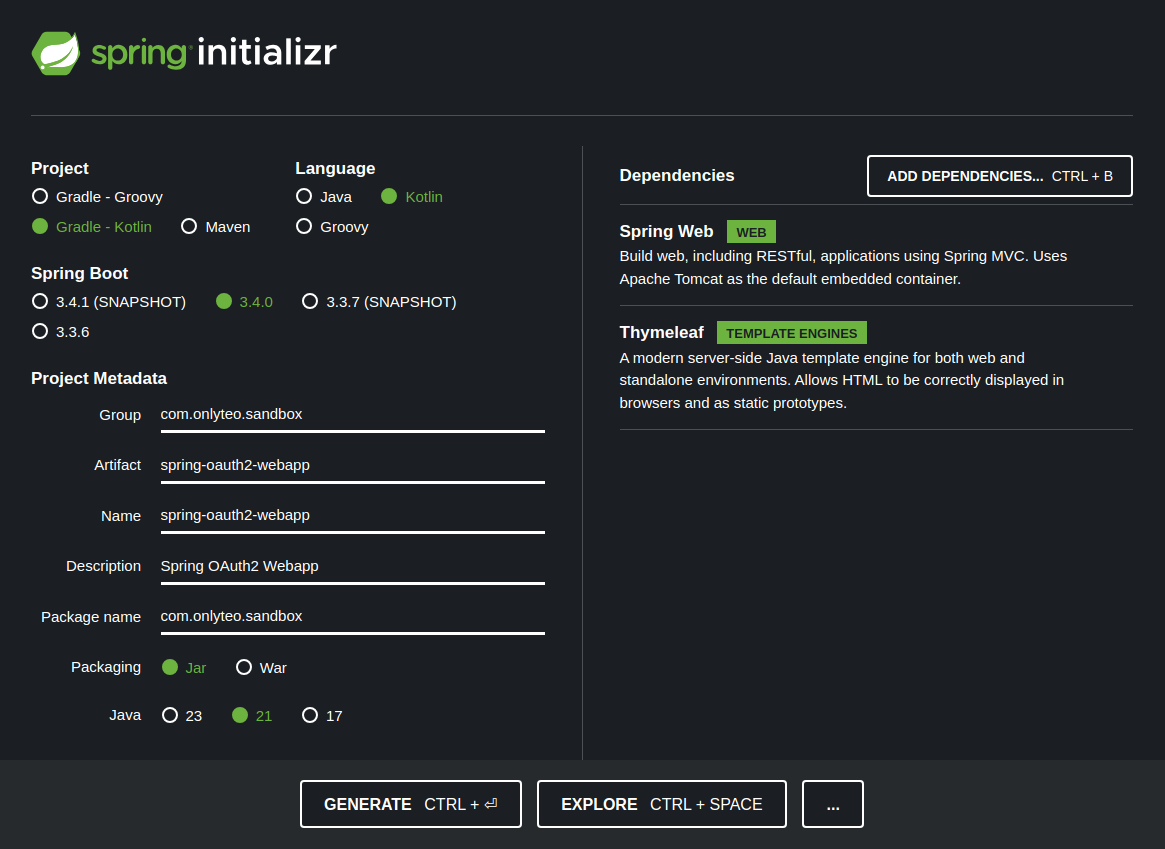
Click the [GENERATE] button to generate and download the project.
Extract and clean up the project Link to heading
Once downloaded we have a .zip file containing a template project. Unzip the archive into a suitable location and
open it in your favorite editor or IDE.
Delete unnecessary files until your project look something like this:
▼ spring-oauth2-webapp
   ⯈ gradle
   ▼ src
      ▼ main
         ▼ kotlin
            ▼ com
               ▼ onlyteo
                  ▼ sandbox
                     SpringOauth2WebappApplication.kt
         ▼ resources
            application.properties
   .gitignore
   build.gradle.kts
   gradlew
   gradlew.bat
   settings.gradle.kts
The easiest way to configure Spring Security is by using the properties based configuration support. Since this is a Spring Boot enabled application it will automatically instantiate the necessary Spring beans in order bootstrap Spring Security features.
For better readability we will swap the configuration file application.properties from a properties file to a yaml
file application.yaml. The contents should be modified into YAML format:
spring:
  application:
    name: spring-oauth2-webapp
  security:
    oauth2:
      client:
        registration:
          spring-oauth2-webapp:
            provider: spring-authorization-server
            client-id: spring-oauth2-webapp
            client-secret: G4nd4lf
            scope:
              - openid
              - profile
              - roles
            authorization-grant-type: authorization_code
            client-authentication-method: client_secret_basic
        provider:
          spring-authorization-server:
            issuer-uri: http://127.0.0.1:8888 # Use IP to avoid session cookie collision

logging:
  level:
    root: INFO
    com.onlyteo: DEBUG
The most important properties are under the spring.security.oauth2.client prefix. There is an entry for an OAuth2
Client named spring-oauth2-webapp. This mirrors the configuration in the Webapp.
There has also been added properties for logging.
Add a Thymeleaf home page Link to heading
First we add an MVC Controller bean ViewController to the /src/main/kotlin/ path under the
com.onlyteo.sandbox.controller package with the following contents:
package com.onlyteo.sandbox.controller

import org.springframework.stereotype.Controller
import org.springframework.web.bind.annotation.GetMapping

@Controller
class ViewController {

    @GetMapping(path = ["/"])
    fun getIndexPage(): String {
        return "index"
    }
}
Then we add a Thymeleaf enabled home page index.html to the /src/main/resources/templates/ path with the
contents:
```html
<!DOCTYPE html>
<html lang="en" xmlns:sec="http://www.thymeleaf.org/thymeleaf-extras-springsecurity6">
<head>
    <title>Spring OAuth2 Webapp</title>
    <meta http-equiv="Content-Type" content="text/html; charset=UTF-8"/>
    <link rel="stylesheet"
          href="https://cdn.jsdelivr.net/npm/bootstrap@5.3.3/dist/css/bootstrap.min.css"
          integrity="sha384-QWTKZyjpPEjISv5WaRU9OFeRpok6YctnYmDr5pNlyT2bRjXh0JMhjY6hW+ALEwIH"
          crossorigin="anonymous">
</head>
<body>
<main>
    <header class="text-bg-dark px-5 py-3">
        <h5 class="m-0">Spring OAuth2 Webapp</h5>
    </header>
    <section class="px-5 py-4">
        <p>You are logged in as <b sec:authentication="name"></b></p>
    </section>
</main>
</body>
</html>
We have added a sec XML namespace that is used to show the username using the sec:authentication="name" parameter.
With these changes in place the project should look like this:
▼ spring-oauth2-webapp
   ⯈ gradle
   ▼ src
      ▼ main
         ▼ kotlin
            ▼ com
               ▼ onlyteo
                  ▼ sandbox
                     ▼ controller
                        ViewController.kt
                     SpringOauth2WebappApplication.kt
         ▼ resources
            ▼ templates
               index.html
            application.yaml
   .gitignore
   build.gradle.kts
   gradlew
   gradlew.bat
   settings.gradle.kts
That is all the necessary changes required to secure the Webapp using the Authorization Code grant type, which is the recommended login flow for UI based web applications.
Testing the OAuth2/OIDC Authorization Code login flow Link to heading
Both the applications are now fully configured, and we are ready to test the Authorization Code login flow.
Run the Authorization Server Link to heading
In a terminal go into the project folder of the Authorization Server ./extended-spring-authorization-server and
start the Spring Boot application using Gradle:
./gradlew bootRun
The application is running when you see it logging the following message in the terminal:
Started ExtendedSpringAuthorizationServerApplicationKt in X seconds
Run the Webapp Link to heading
In a terminal go into the project folder of the Webapp ./spring-oauth2-webapp and start the Spring Boot
application using Gradle:
./gradlew bootRun
The application is running when you see it logging the following message in the terminal:
Started SpringOauth2WebappApplicationKt in X seconds
Register and log in Link to heading
Let’s open the home page of the Webapp in a browser http://localhost:8080.
We see that we are quickly redirected to the Authorization Server address for login http://127.0.0.1:8888/login.
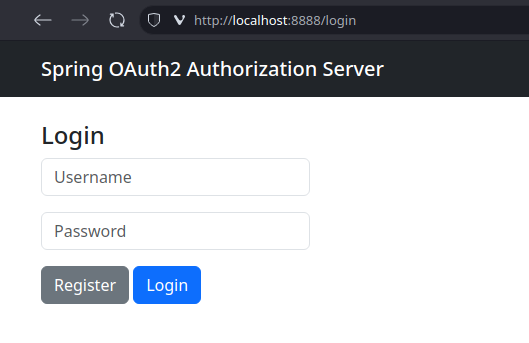
We don’t have any user credentials yet that we can use to log in, so we need to first register a new user. We click
the [Register] button to navigate to the registration page.
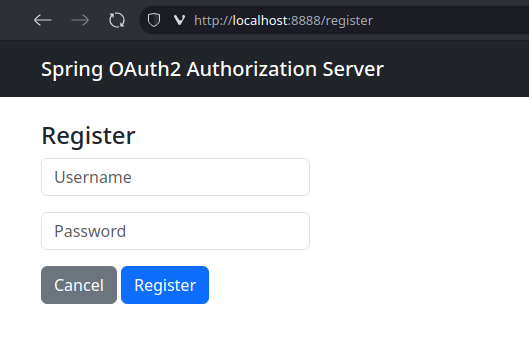
We supply the username and password combination we want and click the [Register] to complete the registration of
our new user.
After the registration completes we are redirected back to the login page. Here we supply the same credentials we
used when we registered, and then we click [Login].
Upon successful login we will be redirected back to the Webapp home page.
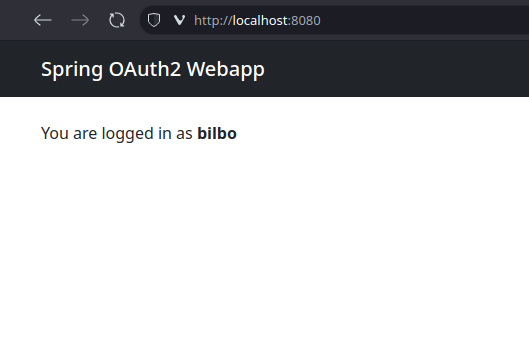
We see that the home page displays the username of the logged-in user.
And that is it! We have a working OAuth2 Client and OAuth2 Authorization Server. In the next part of this series we will extend the Authorization Server with the features listed in the intro. Happy coding!