Intro Link to heading
This post describes how to create and deploy a website like this one. This website was created with Hugo, which is a static site generator. More specifically what that means is that Hugo generates static HTML pages from Markdown content, with styling managed by its inbuilt theme and templating system.
I’ve managed many website over the years. From the early years of static self-hosted websites. To more dynamic websites using PHP and Perl. In later years it’s been fully dynamic websites using JavaScript and Node.js. These websites were often fully fledged CMS websites with a database, admin interface and built in WYSIWYG editor. For a small tech blog like this one such setups are too complex to manage and an overkill when it comes to features. So when I wanted to create a new website I wanted something really simple. Hugo was a perfect choice.
Prerequisites Link to heading
The Hugo CLI should be installed on your computer.
Create your own website Link to heading
Hugo based websites have a very straight forward and code driven setup. Since such a website is based on Markdown
content, Markup templates and styling it is easy to version in a Git repository. In its simplest form a website
consists of a configuration file (TOML or YAML), a /content/ folder containing
the markdown pages, and a theme in the /themes/ folder. The theme contains its own configuration file, markup
templates, stylesheets and also content types known as archetypes.
Using the Hugo CLI Link to heading
1. Create a new Hugo website Link to heading
hugo new site my-new-website
2. Change to newly created website folder Link to heading
cd my-new-website
3. Create a new Hugo theme Link to heading
hugo new theme my-new-theme
4. Modify Hugo configuration file Link to heading
Open the /hugo.toml configuration file in your favorite text editor or IDE.
title = "My New Website"
baseURL = "https://my-new-website.github.com"
languageCode = "en"
theme = "my-new-theme"
The title is used throughout the website, while theme is the folder name within the /themes/ folder that
contains the active theme for the website.
5. Create new content Link to heading
hugo new content index.md
Add content to the newly created Markdown file /content/index.md.
+++
title = "My New Post"
date = 2024-01-01T12:00:00+00:00
draft = false
+++

# My New Post
This is my new post.
6. Make website into a Git repository Link to heading
touch .gitignore
echo "/public/" >> .gitignore
echo "/resources/_gen/" >> .gitignore
echo "/.hugo_build.lock" >> .gitignore
git init
git add -A
git commit -m "Initial commit"
7. Start Hugo server Link to heading
With this in place your website structure should look like this. The Hugo CLI creates several empty folders which have been removed in the folder view below.
▼ my-new-website
   ▼ content
      index.md
   ▼ themes
      ▼ my-new-theme
         ▼ archetypes
            default.md
         ▼ layouts
            ▼ _default
               baseof.html
               list.html
               single.html
            ⯈ partials
               404.html
               index.html
         theme.toml
   hugo.toml
Run the Hugo server:
hugo server
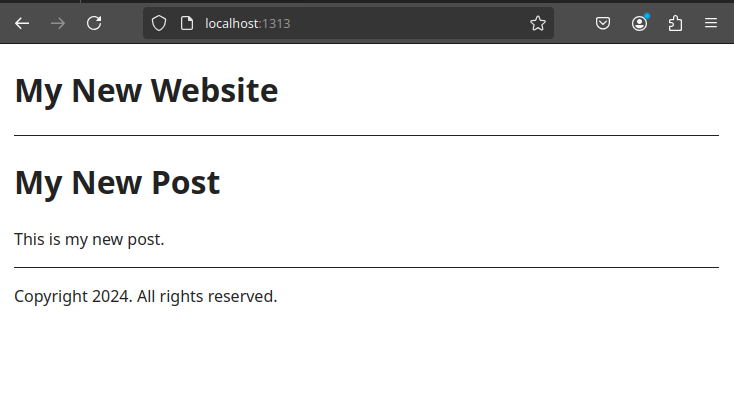
Open the website http://localhost:1313 in your browser.

The default theme generated by Hugo does not offer any out-of-the-box styling, so the webpage looks very basic. We will apply improved styling and layout in the following sections.
Customize your website Link to heading
First, to get a better looking website we will add a community developed theme. After that we will add new content to the website. Then, based on the theme we will apply custom templates and styling to get the website looking like we want.
Add theme Link to heading
We will choose the Coder theme for our website. The theme is hosted in a Git repository, so we will add it as a Git Submodule into our website’s Git repository.
1. Add theme as Git Submodule Link to heading
git submodule add https://github.com/luizdepra/hugo-coder.git themes/hugo-coder
2. Update the Hugo config file Link to heading
title = "My New Website"
baseURL = "https://example.org"
languageCode = "en"
theme = "hugo-coder"

[params]
author = "John Doe"
description = "My New Website"
keywords = "developer,personal"
info = ["Deveoper", "Human"]
The author, description and keywords parameters are used in their respective HTML <meta ... /> tags in the
page header. The author and info parameters are used in the body of the website home page.
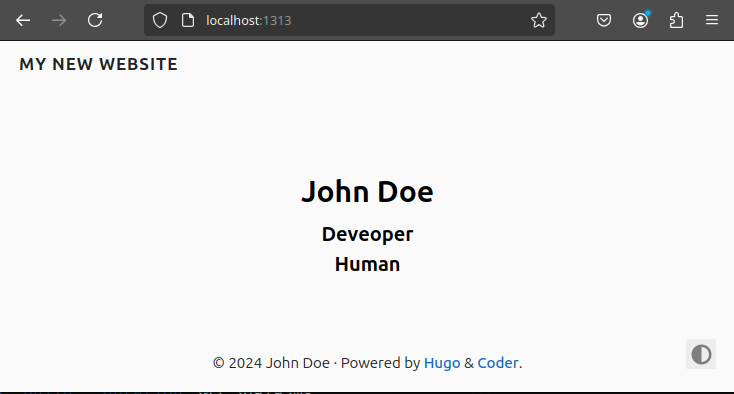
With the Coder theme applied the website now looks like this:

It looks somewhat better than with the default theme. In the next sections we will customize the content types, templates and styling of the theme to make the website look event better.
Add content types Link to heading
Hugo websites have the possibility of defining different content types. Content types makes it possible to group and
style content differently. A food and cooking website might have a recipes content type, and a photo website might
have an albums content type. In Hugo, content types are called archetypes.
The Coder theme is meant for blogging websites, so it comes with a posts.md archetype. If we look into the
/themes/hugo-coder/archetypes/ folder we see that content types are just Markdown files named for the type that
they represent. The default.md file is for content that doesn’t have a specific type.
If we want to add any additional content types add an *.md archetype to the /archetypes/ folder. The archetype
file contents will be used as a blueprint when creating new content of that type. E.g.
+++
title = ""
description = ""
date = {{ .Date }}
draft = true
+++
Add content Link to heading
As we are creating a blog, let’s create a new blog post for our website.
hugo new content posts/this-is-my-first-blog-post.md
Let’s add some content to our new blog post.
+++
title = "My First Blog Post"
description = "This is my fist blog post"
date = 2024-01-01T12:00:00+00:00
draft = false
+++

# My First Blog Post
Welcome to my first blog post!
With Hugo still running it should have automatically generated a new HTML webpage from the Markdown content we just added. But if we refresh the browser it seems like nothing has changed. The home page looks the same. Thought if we manually enter the address to the blog post we get the webpage: http://localhost:1313/posts/this-is-my-first-blog-post.
In the next sections we will see how we can change the look and feel of the website.
Add custom templates Link to heading
To customize how a Hugo website looks it is possible to simply make changes to the theme. But since we used a community supplied theme changing it would make it cumbersome to update the theme if the theme author patches or improves the theme. We want to leave the theme untouched, so what can we do instead?
We can mirror the file and folder structure of the theme into the root folder of our website in order to override individual files of the theme. Templates in the root folders takes precedence over templates in the theme folders.
First we want to change the home page. Instead of showing information about the author it should show a list of the
most recent blog posts. If we look at the contents of the root template /themes/hugo-coder/layouts/index.html we
see that it refers to the home.html partial template.
{{ define "content" }}
  {{ partial "home.html" . }}
{{ end }}
Lets’ create a partial template in root folder /layouts/partials/home.html with the following HTML.
{{ with .GetPage "posts" }}
<section class="container">
    <h1>Latest posts</h1>
    <ul>
        {{ range last 10 .Pages }}
        <li>
            <span><a href="{{ .RelPermalink }}">{{ .Title }}</a></span>
            <span> - </span>
            <span>{{ .Date | time.Format (.Site.Params.dateFormat | default "January 2, 2006" ) }}</span>
        </li>
        {{ end }}
    </ul>
</section>
{{ end }}
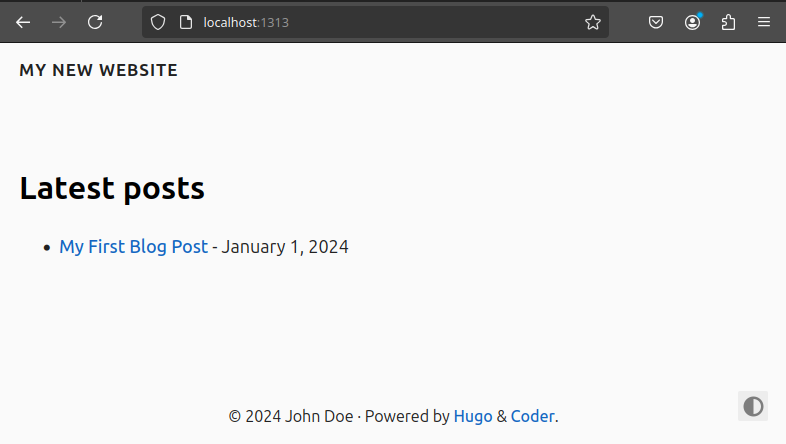
If we now refresh the browser we can see that we get a list of blog posts on the home page:

Apply custom styling Link to heading
Adding custom stylesheets to the Coder theme is very easy. Many of the themes have equally easy configuration for
additional stylesheets. All you have to do is add the name of the custom stylesheet to the [params] section of the
hugo.toml website configuration file.
[params]
customCSS = ["css/custom.css"]
After that just create a custom.css file in the /assets/css/ folder and start adding or overriding styling.
Deploy your website to GitHub Pages Link to heading
Once we have a website we are satisfied with we want to publish it on the Internet. GitHub Pages is a free and easy
way to host a website. Each GitHub user and organization has the option to host a website in GitHub Pages. If your
username is my-username then your corresponding GitHub Page will be
my-username.github.io.
Add GitHub Action Link to heading
To publish to GitHub Pages we will use GitHub Action. We create a workflow file /.github/workflows/hugo.yaml with
the following contents:
# Workflow for building and deploying a Hugo site to GitHub Pages
name: Deploy Hugo site to GitHub Pages

on:
  # Runs on pushes targeting the default branch
  push:
    branches:
      - main
  # Runs on a schedule once a month
  schedule:
    - cron: "0 0 1 * *"

  # Allows you to run this workflow manually from the Actions tab
  workflow_dispatch:

# Sets permissions of the GITHUB_TOKEN to allow deployment to GitHub Pages
permissions:
  contents: read
  pages: write
  id-token: write

# Allow only one concurrent deployment, skipping runs queued between the run in-progress and latest queued.
# However, do NOT cancel in-progress runs as we want to allow these production deployments to complete.
concurrency:
  group: "pages"
  cancel-in-progress: false

# Default to bash
defaults:
  run:
    shell: bash

jobs:
  # Build job
  build:
    runs-on: ubuntu-latest
    env:
      HUGO_VERSION: 0.136.2
    steps:
      - name: Install Hugo CLI
        run: |
          wget -O ${{ runner.temp }}/hugo.deb https://github.com/gohugoio/hugo/releases/download/v${HUGO_VERSION}/hugo_extended_${HUGO_VERSION}_linux-amd64.deb \
          && sudo dpkg -i ${{ runner.temp }}/hugo.deb
      - name: Install Dart Sass
        run: sudo snap install dart-sass
      - name: Checkout
        uses: actions/checkout@v4
        with:
          submodules: recursive
          fetch-depth: 0
      - name: Setup Pages
        id: pages
        uses: actions/configure-pages@v5
      - name: Install Node.js dependencies
        run: "[[ -f package-lock.json || -f npm-shrinkwrap.json ]] && npm ci || true"
      - name: Build with Hugo
        env:
          # For maximum backward compatibility with Hugo modules
          HUGO_ENVIRONMENT: production
          HUGO_ENV: production
        run: |
          hugo \
            --gc \
            --minify \
            --baseURL "${{ steps.pages.outputs.base_url }}/"
      - name: Upload artifact
        uses: actions/upload-pages-artifact@v3
        with:
          path: ./public

  # Deployment job
  deploy:
    environment:
      name: github-pages
      url: ${{ steps.deployment.outputs.page_url }}
    runs-on: ubuntu-latest
    needs: build
    steps:
      - name: Deploy to GitHub Pages
        id: deployment
        uses: actions/deploy-pages@v4
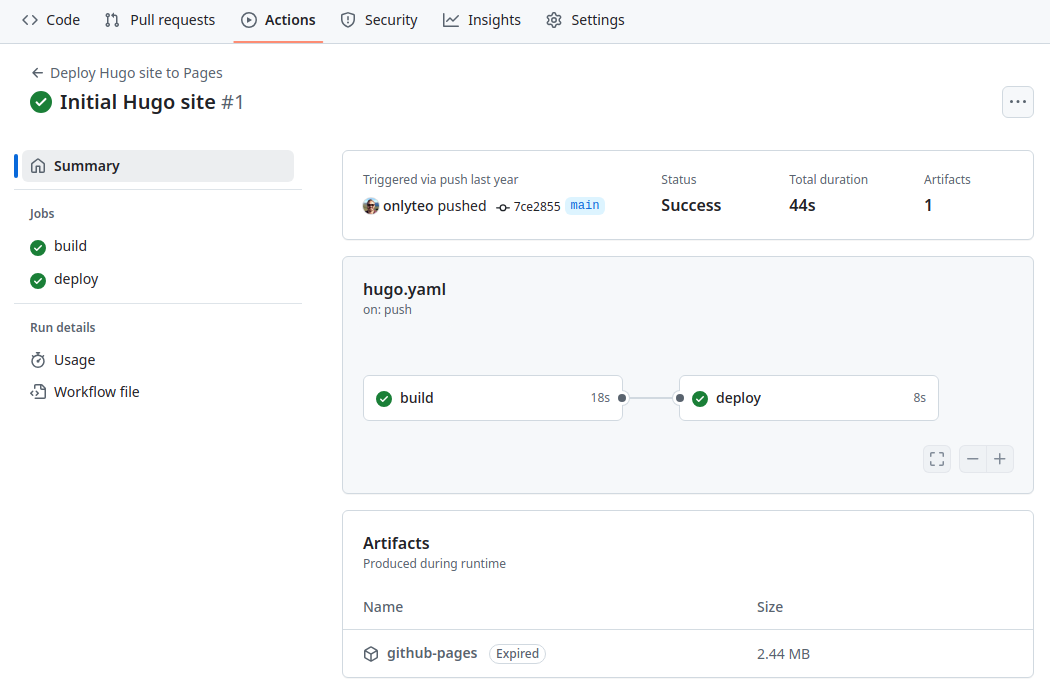
The workflow has two jobs. The first one is the build job that installs the Hugo CLI, then uses that to generate
the website contents and build it into a deployable artifact. The second one is the deploy job that deploys the
artifact to GitHub Pages.
Commit and push to GitHub Link to heading
So with all this in place we will commit and push the contents to GitHub so that the GitHub Action will run.
git add -A
git commit -m "Initial Hugo site"
git remote add origin git@github.com:my-username/my-new-website.git
git push --set-upstream origin main
If you navigate to the Actions tab in your GitHub repository you should see the jobs running. Once those jobs have
completed successfully the website should be live on my-username.github.io.
